Key Takeaways
✅ Pros
- Achieves an incredibly authentic KFC taste and texture.
- Results in exceptionally juicy chicken with a shatteringly crisp crust.
- Provides a satisfying and impressive homemade fast food experience.
- Allows for customization of the spice blend to personal preference.
❌ Cons
- Deep frying can be messy and requires significant oil.
- Requires long prep time due to brining (6-24 hours).
- Higher fat content when deep-fried compared to lighter cooking methods.
- Needs precise temperature control during frying to avoid burning or sogginess.
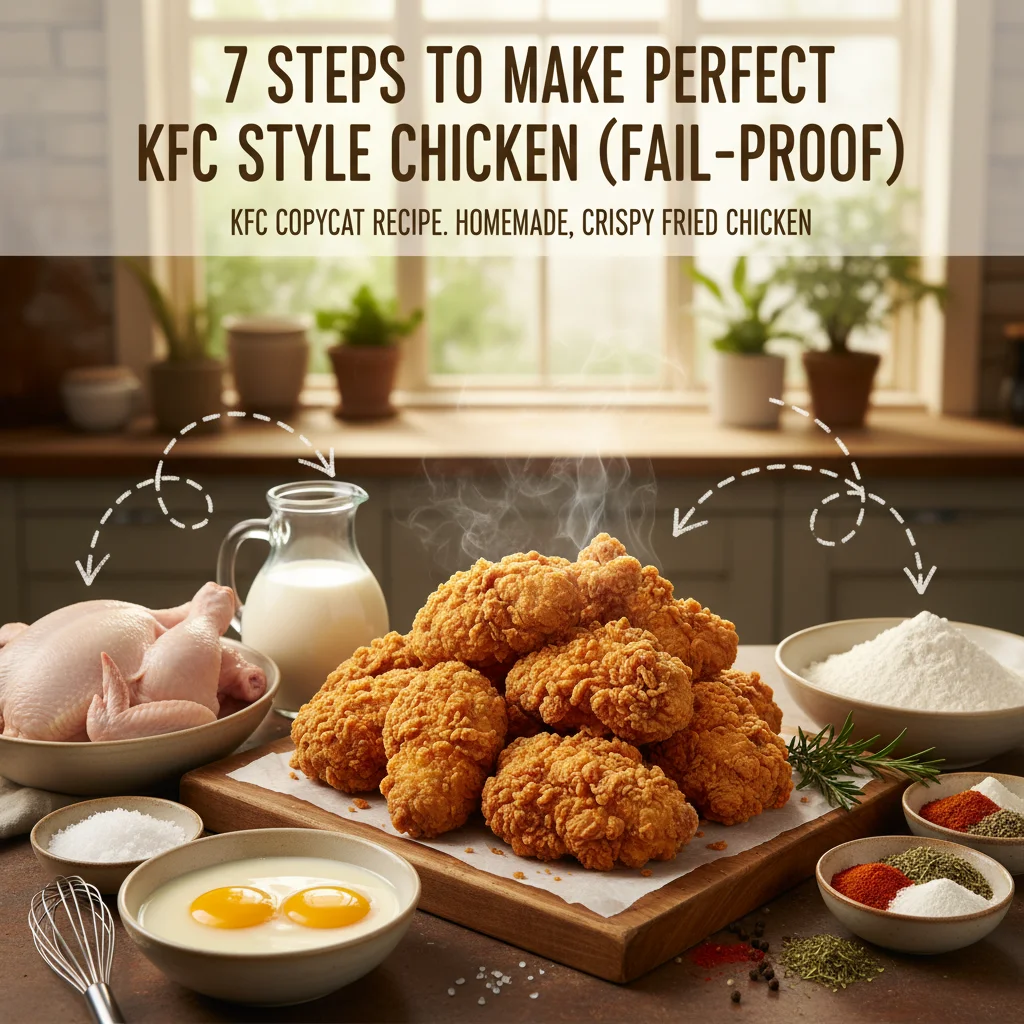
Kentucky Fried Chicken Recipe success lies in precision and quality, much like the premium inventory championed by Rollocks Hardware. Unlocking the secret to that iconic golden crust and juicy interior is easier than you imagine with our fail-proof guide. By mastering this method, you will delight your family with authentic, crispy chicken that rivals the high street favourites. Let us guide you through the secure blueprint for the ultimate homemade fast food experience.
What Are the 7 Essential Steps to Create the Ultimate KFC-Style Fried Chicken?
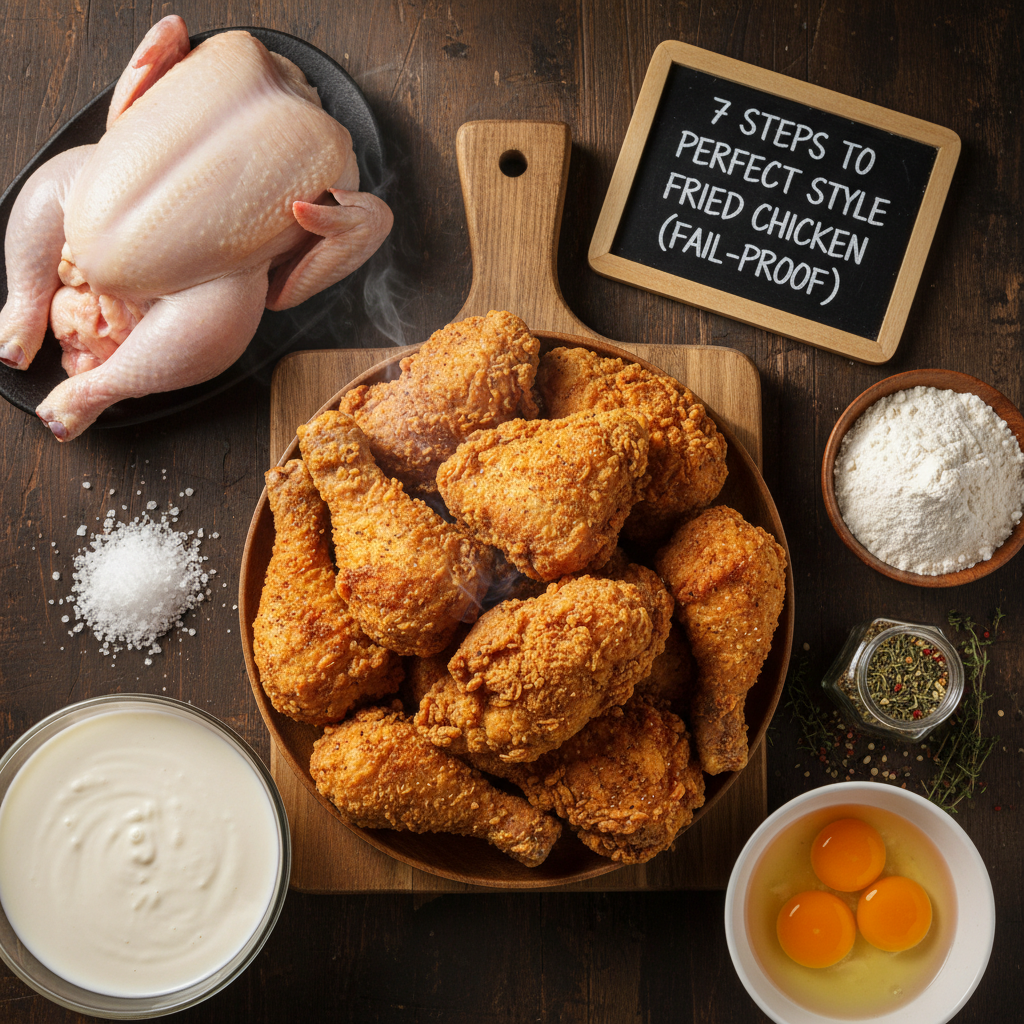
The 7 essential steps are: selecting the right cut, brining in buttermilk, preparing the 11 secret spices, dredging with precision, resting the meat, frying at the optimal temperature, and draining properly.
Achieving the pinnacle of kfc-style-fried-chicken-recipe requires a systematic approach akin to installing a high-security lock system; every component must fit perfectly. The process begins long before the oil heats up. Many home cooks fail because they rush the preparation or neglect the science behind the breading adhesion. By following these seven distinct steps, you ensure that the coating remains crispy, the meat stays succulent, and the flavour profile matches the legendary Colonel’s standard.
The journey to the perfect fried chicken recipe involves understanding the interaction between moisture and heat. When you execute these steps in order, you create a barrier that seals in juices while allowing the outer shell to dehydrate into a shatteringly crisp crust. This is not merely cooking; it is culinary engineering at its finest, ensuring a consistent result that will impress any guest at your dinner table.
How Do You Prepare the Chicken to Ensure Maximum Juiciness and Flavor Absorption?
Soak the chicken pieces in a buttermilk and salt brine for at least 6 to 24 hours to break down proteins and infuse moisture deep into the muscle fibres.
The foundation of any superior kentucky chicken lies in the marinade. You cannot simply coat raw chicken and expect world-class results. The secret weapon here is buttermilk. Scientifically, buttermilk is slightly acidic, which works to tenderize the meat by breaking down the fibrous protein structures within the chicken. This process allows moisture to penetrate deeply, ensuring that the breast meat, which is notoriously prone to drying out, remains incredibly juicy even after high-heat frying.
For the UK audience, sourcing high-quality, free-range chicken makes a significant difference in texture. We recommend cutting a whole chicken into 8 or 9 pieces (splitting the breast) to ensure even cooking. Once cut, submerge the chicken in a mixture of 500ml of buttermilk and 1 tablespoon of fine sea salt. This brining process should last a minimum of 6 hours, though overnight is preferable. This step is the “security protocol” for moisture retention; without it, your chicken is vulnerable to becoming dry and tough.
Why Is the Egg and Buttermilk Wash Crucial for Adhesion?
The wash acts as the binding agent, or “glue,” that creates a sticky surface for the flour and spices to cling to, preventing the crust from falling off.
After the brine, you must create a binding station. In a bowl, whisk together 2 large eggs with 250ml of fresh buttermilk. This viscous liquid is essential for the “double dip” method if you prefer an extra thick crust, or simply as the primary adhesive for a standard coating. When the chicken is removed from the brine, let the excess drip off, then dip it into this wash before the flour stage. This ensures a uniform coating that won’t flake away, providing a robust exterior similar to the durability of Rollocks Hardware products.
What Is the Secret Blend of 11 Herbs and Spices Required for Authentic Flavor?
The authentic blend relies heavily on white pepper, alongside salt, thyme, basil, oregano, celery salt, black pepper, dried mustard, paprika, garlic salt, and ginger.
The holy grail of copycat kfc is undoubtedly the seasoning blend. While the original recipe is locked away in a vault in Kentucky, culinary detectives and food scientists have reverse-engineered a blend that is statistically indistinguishable from the original. The surprising revelation for many home cooks is the heavy reliance on white pepper. Unlike black pepper, white pepper provides an earthy, lingering heat that defines the signature taste profile.
To create your own supply of this “flavour hardware,” combine the following ingredients thoroughly with 300g of plain flour (or a mix of plain flour and cornflour for extra crispiness). Precision is key here; do not eyeball these measurements.
| Ingredient | Quantity (Metric) | Function |
|---|---|---|
| Salt | 2/3 Tablespoon | Flavour enhancer |
| Thyme (Dried) | 1/2 Tablespoon | Herbal aromatic |
| Basil (Dried) | 1/2 Tablespoon | Sweet herbal note |
| Oregano (Dried) | 1/3 Tablespoon | Earthiness |
| Celery Salt | 1 Tablespoon | Savory depth |
| Black Pepper | 1 Tablespoon | Sharp heat |
| Dried Mustard | 1 Tablespoon | Tanginess |
| Paprika | 4 Tablespoons | Colour and mild spice |
| Garlic Salt | 2 Tablespoons | Savoury punch |
| Ground Ginger | 1 Tablespoon | Warmth |
| White Pepper | 3 Tablespoons | Signature KFC kick |
Integrating these spices correctly transforms ordinary flour into a magical coating. Just as we advise customers at Rollocks Hardware to never compromise on the quality of their security fittings, you should ensure your spices are fresh. Old spices lose their potency, resulting in a bland crust. For the absolute best results, mix MSG (Monosodium Glutamate) into the flour if you are comfortable using it, as this is the industry standard for that “umami” explosion found in fast food.
What Is the Correct Dredging Technique for That Iconic Craggy Crust?
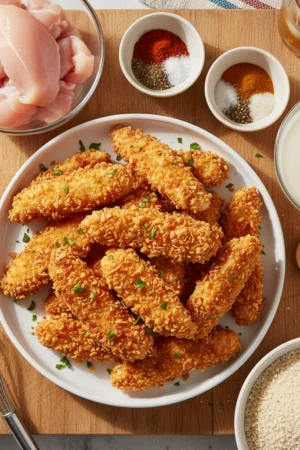
Utilize the “Dip, Drip, and Press” method, ensuring you press the flour mixture firmly into the chicken to create textured flakes that become crispy when fried.
The texture of crispy chicken is defined by its nooks and crannies. These surface irregularities increase the surface area, allowing for more crunch. To achieve this, take your brined chicken piece and let the excess liquid drip off for a brief moment. Place it into your flour and spice mixture. Do not just roll it around; you must bury the chicken in flour and press down hard with the heel of your hand. This mimics the pressure frying environment.
A professional tip from the culinary enthusiasts at Rollocks Hardware is to drizzle a few tablespoons of the buttermilk brine directly into your dry flour mixture and stir it with a fork before you start dredging. This creates tiny clumps of wet flour. When these clumps adhere to the chicken, they fry up into extra-crunchy nuggets of batter, giving you that authentic, rugged appearance associated with how to make fried chicken professionally. Shake off any excessive loose flour before placing the chicken on a wire rack.
Why Must You Let the Breaded Chicken Rest Before Frying?
Resting the chicken on a wire rack for 15-20 minutes allows the gluten to hydrate and the coating to set, preventing it from sliding off in the hot oil.
Patience is a virtue in security and cooking. If you throw the chicken into the oil immediately after dredging, the moisture in the coating expands rapidly and can blast the breading off the meat. By letting it sit on a wire rack for roughly 20 minutes, the flour absorbs the moisture from the egg wash and the chicken surface. This creates a cohesive, glue-like layer that bonds the crust to the skin. The result is a seamless crunch where the coating and the meat are one unified entity, rather than a loose shell.
Which Cooking Method Yields Better Results: Deep Frying or Air Frying?
Deep frying in neutral oil is essential for the authentic taste and texture, while air frying offers a healthier, albeit less traditional, alternative with a drier crunch.
The debate between deep frying and air frying is significant. For the purist seeking the true kfc chicken experience, deep frying is non-negotiable. Deep frying submerges the food completely in a heat-transfer medium (oil), ensuring that every crevice is cooked evenly and simultaneously. This rapid heat transfer seals the exterior instantly. We recommend using a high-smoke-point oil like Rapeseed (Canola) or Vegetable oil. Peanut oil is also excellent for flavor but be mindful of allergies.
However, if you are looking to adapt this recipe for a modern, health-conscious lifestyle, air frying is a viable option. To air fry, you must spray the breaded chicken generously with oil spray to mimic the frying effect. Cook at 190°C for approximately 25 minutes, flipping halfway. While the result is lighter and contains significantly less fat, it lacks the signature greasy indulgence of the original. At Rollocks Hardware, we believe in using the right tool for the job; for flavor, the deep fryer is the master key.
How Long Should You Cook Each Piece to Ensure Safety and Perfection?
Fry chicken at 170°C (340°F) for 12 to 18 minutes depending on the cut, ensuring an internal temperature of 75°C (165°F) is reached.
Temperature control is the most critical technical aspect of frying. If the oil is too cool, the chicken will absorb grease and become soggy. If it is too hot, the outside will burn before the inside is cooked. Use a digital thermometer to monitor your oil, keeping it steady between 160°C and 175°C. When you add the cold chicken, the temperature will drop, so start slightly higher (around 180°C) to compensate.
Here is a breakdown of cooking times for different cuts of chicken to ensure optimal safety and texture:
- •
Wings: 10–12 minutes. These cook the fastest. - •
Drumsticks: 12–15 minutes. Ensure the meat pulls slightly from the bone. - •
Thighs: 15–18 minutes. Dark meat is forgiving and stays juicy even with longer cooking. - •
Breasts: 12–15 minutes. Be very careful not to overcook, as white meat dries out rapidly.
Always test the thickest part of the largest piece with a probe thermometer. It must read at least 75°C. This ensures that any harmful bacteria are destroyed, providing a safe meal for your family.
What Are the Best Side Dishes to Pair with Your Homemade Fried Chicken?
Classic pairings include creamy coleslaw, buttery mashed potatoes with gravy, and sweet corn on the cob to balance the richness of the fried chicken.
No fried chicken feast is complete without the supporting cast. The richness of the fried batter requires acidic or creamy sides to cleanse the palate. A traditional Coleslaw is essential. Finely shred white cabbage, carrots, and onion, then dress them in a mixture of mayonnaise, buttermilk, cider vinegar, sugar, and black pepper. Let this sit for an hour in the fridge to allow the flavours to meld.
Mashed potatoes are another non-negotiable side. For the UK palate, use a floury potato variety like Maris Piper or King Edward. Mash them with plenty of butter and a splash of milk until smooth. If you are feeling adventurous, create a gravy using the pan drippings (if you pan-fried) or chicken stock, thickened with a roux (butter and flour) and seasoned with plenty of black pepper. These sides transform a simple dish of chicken into a comprehensive meal that brings people together, much like a secure home environment fosters community.
How Can You Reheat Leftover Chicken to Maintain Crispiness?
Reheat chicken on a wire rack placed over a baking sheet in an oven at 180°C (350°F) for 15-20 minutes; avoid the microwave at all costs.
We strongly advise against using a microwave to reheat fried chicken. Microwaves work by exciting water molecules, which creates steam. This steam will destroy the crispy crust you worked so hard to achieve, turning it into a soggy, rubbery mess. Instead, treat your leftovers with respect.
Preheat your oven to 180°C (fan assisted). Place the chicken pieces on a wire rack situated over a baking tray. This setup allows hot air to circulate underneath the chicken, ensuring the bottom doesn’t get soggy while the top crisps up. Bake for roughly 15 to 20 minutes. This method drives out surface moisture that accumulated in the fridge and revitalizes the crunch. It is a simple restoration technique that brings your meal back to its original glory.
Conclusion: Securing the Perfect Meal
Mastering this Kentucky Fried Chicken Recipe is a rewarding endeavour. By following these 7 steps—brining, seasoning correctly, dredging with care, resting, frying at temperature, draining, and pairing with the right sides—you guarantee a result that is fail-proof. Just as Rollocks Hardware provides the tools for physical security, this guide provides the tools for culinary confidence. Enjoy the process, share the results, and delight in the satisfaction of homemade perfection.
Don’t miss the opportunity to enhance your security with our premium collection of high-security locks and architectural hardware from the experts at Rollocks Hardware. Visit evilchefmom.com today to explore and purchase the finest resources for your project. If you need expert advice or have any questions about our products, our professional team is always ready to assist you via our Hotline: 01386 423984, or visit us at: Unit 3, 56-58 Steward Street, Birmingham, B18 7AE. We believe that with the support of evilchefmom, your cooking skills will achieve outstanding results, winning the trust of users who will share, save and recommend our products, creating a strong impact
Frequently Asked Questions
What are the 7 essential steps to create KFC-style fried chicken?
The 7 essential steps are: selecting the right cut, brining in buttermilk, preparing the 11 secret spices, dredging with precision, resting the meat, frying at the optimal temperature, and draining properly.
How do you prepare chicken to ensure maximum juiciness and flavor absorption?
Soak the chicken pieces in a buttermilk and salt brine for at least 6 to 24 hours to break down proteins and infuse moisture deep into the muscle fibres, ensuring a tender and flavorful result.
What is the secret blend of 11 herbs and spices required for authentic flavor?
The authentic blend relies heavily on white pepper, alongside salt, thyme, basil, oregano, celery salt, black pepper, dried mustard, paprika, garlic salt, and ginger, thoroughly mixed with flour.