Key Takeaways
✅ Pros
- Healthier alternative to deep-fried Chicken Kiev
- Achieves a perfectly crispy exterior without excessive oil
- Retains the delicious molten garlic butter core
- Efficient and convenient cooking method for a classic dish
- Offers a flavorful and satisfying meal
❌ Cons
- Requires careful preparation to prevent butter leakage
- Involves multiple steps including freezing, adding to overall time
- Risk of exterior burning if not monitored closely
- Requires a meat mallet and a reliable meat thermometer for best results
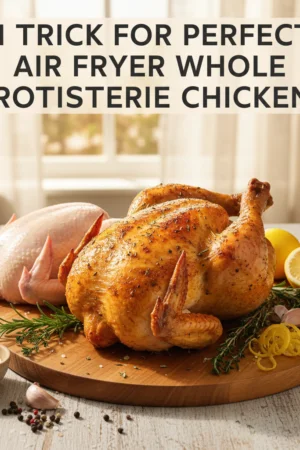
Air Fryer Chicken Kiev Bursting with Garlic Butter
Air Fryer Chicken Kiev offers a magnificent culinary experience, providing a perfectly crispy, breaded chicken air fryer delight with its signature molten interior, and with expert techniques from evilchefmom, you can ensure that luscious garlic butter remains perfectly sealed for an irresistible burst of flavour. Master this classic chicken kyiv recipe, achieving a superior crispy stuffed chicken without the need for deep frying, making it a healthier and highly appealing meal option for any home chef.
How Can You Prevent Garlic Butter from Leaking Out of Chicken Kiev During Air Frying?
To prevent garlic butter leakage, ensure the chicken breast is thoroughly flattened, the butter is firm and centrally placed, and the chicken is rolled tightly with overlapping edges, followed by a double breading and freezing step to create a robust, sealed barrier.
The signature allure of a classic Air Fryer Chicken Kiev lies undeniably in that dramatic burst of aromatic garlic butter. Achieving this culinary triumph without a single drop of the flavourful filling escaping requires precision and an understanding of key preparation techniques. The experts at evilchefmom have perfected a methodical approach to ensure every garlic butter stuffed chicken parcel retains its precious core. The primary challenge stems from the butter’s low melting point combined with the intense heat circulation of an air fryer. Without a proper seal, the butter will inevitably melt and seep out, leading to a dry chicken and a messy cooking experience.
Our comprehensive strategy begins with the butter itself. It is paramount that your garlic herb butter is sufficiently firm, ideally frozen into logs or discs measuring approximately 2-3 cm in diameter and 5-6 cm in length. This solid state provides a longer melting time within the chicken, allowing the outer layers to cook and seal effectively before the butter becomes fully liquid. For optimal results, prepare your butter mixture at least 2 hours in advance and freeze it until solid. A typical garlic butter blend might consist of 100g unsalted butter, softened, mixed with 3 cloves of finely minced garlic, 1 tablespoon of fresh chopped parsley, 1/2 teaspoon of salt, and a pinch of black pepper. Rolling this mixture tightly in cling film into a log and freezing it ensures it maintains its integrity during the crucial initial stages of cooking.
The next critical step involves the chicken breast preparation. Selecting appropriately sized chicken breasts, ideally between 180-220g each, is beneficial. Flattening the chicken to an even thickness of about 0.6-0.8 cm creates a uniform canvas for rolling and sealing. This ensures no thin spots exist where the butter could easily escape. After placing the firm butter in the centre, careful rolling is essential. Begin by folding the short ends over the butter, then tightly roll the chicken from one long side to the other, ensuring complete overlap and no visible seams. The aim is to create a compact, cylindrical shape, similar to a neat spring roll. This meticulous rolling technique, as advocated by culinary experts globally, forms the initial physical barrier against leakage.
Furthermore, a robust breading application is a non-negotiable step. We recommend a double-breading process for superior protection. First, dredge the rolled chicken in seasoned flour, ensuring a complete, thin coating. Next, dip it into a beaten egg mixture, allowing any excess to drip off. Finally, thoroughly coat it in Panko breadcrumbs, pressing gently to adhere them firmly. For an enhanced seal, repeat the egg and Panko stages. This creates a thicker, more durable crust that acts as an additional protective layer, solidifying during air frying to encase the melting butter. Freezing the breaded chicken for at least 30 minutes, or ideally 1-2 hours, before air frying further enhances its structural integrity. This pre-freezing firms up both the chicken and the breading, allowing the exterior to set before the butter fully liquefies, effectively trapping the delightful garlic butter stuffed chicken core.
How Can You Achieve a Crispy Breaded Crust Without Deep Frying in an Air Fryer?
A crispy breaded crust in the air fryer is achieved by using Panko breadcrumbs, applying a light mist of oil, preheating the air fryer, and cooking at an optimal temperature of 190°C to 200°C with adequate space for air circulation.
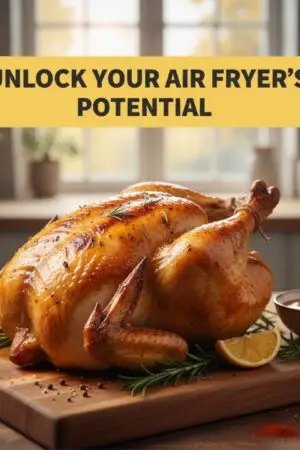
The quest for a perfectly crispy stuffed chicken exterior without the traditional deep-frying method is a primary benefit of using an air fryer for Air Fryer Chicken Kiev. The air fryer excels at circulating hot air rapidly, mimicking the effect of deep fat frying but with significantly less oil. To unlock this potential, several key factors must be meticulously controlled, ensuring your breaded chicken air fryer achieves that coveted golden-brown crunch.
Firstly, the choice of breadcrumbs is paramount. Panko breadcrumbs are widely regarded as the superior option for air frying due to their larger, flakier structure, which allows for greater surface area to crisp up. Unlike fine breadcrumbs, Panko creates a lighter, airier coating that becomes incredibly crunchy. When applying the breading, ensure an even and firm coating, pressing the Panko onto the chicken to maximise adhesion. This dense application of Panko is the foundation of a truly delightful crust.
Secondly, a light application of oil is essential to facilitate browning and crisping. While the air fryer reduces the need for copious oil, a fine mist of cooking spray or a light brush of oil (such as rapeseed or sunflower oil, popular in UK households) over the breaded surface before cooking is highly beneficial. This minimal oil coating helps to conduct heat, enhance flavour, and promote the Maillard reaction, which is responsible for the rich brown colour and savoury taste. Avoid saturating the breadcrumbs, as this can lead to a greasy rather than crispy result. Approximately 1-2 ml of oil per Kiev is typically sufficient.
Preheating your air fryer is a non-negotiable step often overlooked. Just as a conventional oven requires preheating, an air fryer benefits significantly from reaching its target temperature before food is introduced. Preheating to 190°C for 5 minutes ensures immediate crisping upon placement, preventing the breading from becoming soggy. Without preheating, the breading spends valuable minutes drying out before it begins to crisp, compromising the final texture.
Finally, proper air circulation within the air fryer basket is critical. Overcrowding the basket restricts airflow, leading to uneven cooking and steaming rather than crisping. Cook Air Fryer Chicken Kiev in a single layer, ensuring at least 1-2 cm of space between each piece. For larger batches, cooking in multiple rounds is always preferable to compromising on crispness. Turning the chicken halfway through the cooking process also promotes even browning across all surfaces. Optimal cooking temperatures for a crispy exterior generally range from 190°C to 200°C, depending on your specific air fryer model and chicken size.
What is the Correct Method for Flattening and Rolling Chicken Breast for Kiev?
Correctly flattening chicken breast involves butterflying, covering with cling film, and gently pounding to an even 0.6-0.8 cm thickness, while proper rolling requires placing firm butter centrally, folding in short ends, and tightly rolling from one long side to the other, creating a secure, sealed parcel.
The foundation of a successful Air Fryer Chicken Kiev lies in the meticulous preparation of the chicken breast itself. Achieving a uniform thickness and a secure roll is vital for both even cooking and, crucially, for retaining that delightful garlic butter stuffed chicken filling. As the culinary experts at evilchefmom emphasize, precision in these initial stages sets the stage for a truly remarkable dish.
How Do You Properly Flatten a Chicken Breast for Kiev?
Selecting the right chicken breasts is the first step. Opt for boneless, skinless chicken breasts, ideally weighing between 180-220g each. This size offers ample surface area for rolling without becoming overly large. Begin by trimming any excess fat or sinew from the chicken. Place one chicken breast on a clean cutting board. Using a sharp knife, carefully butterfly the chicken breast by slicing horizontally through the thickest part, stopping just before cutting all the way through, so it opens like a book. This creates a larger, thinner piece of chicken.
Next, cover the butterflied chicken breast with a sheet of cling film or place it inside a large freezer bag. This prevents the meat fibres from tearing and keeps your work surface clean. Using a meat mallet or the flat side of a rolling pin, gently but firmly pound the chicken, working from the centre outwards. The goal is to achieve an even thickness of approximately 0.6 to 0.8 cm across the entire surface. Pay particular attention to the thicker parts, ensuring uniformity. An even thickness is crucial for consistent cooking and creating a tight seal around the butter. Over-pounding can tear the meat, which compromises the butter retention. The process typically takes 2-3 minutes per breast, transforming the chicken into a flexible, pliable sheet.
What is the Best Technique for Rolling Chicken Kiev to Prevent Leakage?
Once the chicken is perfectly flattened, the rolling technique becomes paramount for sealing in the butter. On a clean surface, lay the flattened chicken breast with one of the longer edges closest to you. Place a firm, pre-frozen log or disc of garlic butter (as detailed in the previous section) near the bottom edge, centrally. Ensure the butter is completely solid; this is a critical factor in preventing premature leakage.
Carefully fold the short ends of the chicken breast over the butter, overlapping them slightly. This creates the first layer of encapsulation for your garlic butter stuffed chicken. Then, starting from the edge closest to you, tightly roll the chicken upwards, away from you. The key is to keep the roll as compact and firm as possible, ensuring the chicken completely encases the butter. Any gaps or loose rolling can create avenues for the butter to escape during cooking. The final product should be a neat, cylindrical parcel, completely sealed with no visible butter. This meticulous rolling, combined with the earlier steps, significantly contributes to the success of your chicken kyiv recipe, promising a delightful burst of flavour with every cut.
How Do You Ensure Chicken Kiev is Cooked Through Without Burning the Crispy Exterior in an Air Fryer?
To ensure proper doneness without burning, preheat the air fryer to 190°C, cook for 18-22 minutes, turning halfway, and verify an internal temperature of 74°C with a digital thermometer, using an initial lower temperature if browning too quickly.
Achieving a perfectly cooked Air Fryer Chicken Kiev involves a delicate balance: ensuring the chicken is thoroughly cooked to a safe internal temperature while preserving the exquisite golden crispness of its exterior. The air fryer, with its powerful convection, offers an efficient way to achieve this, but precise temperature and timing management are crucial. The culinary experts at evilchefmom emphasize that food safety and culinary excellence can coexist harmoniously with the right techniques.
The fundamental principle for safe chicken consumption is reaching an internal temperature of 74°C (165°F). This temperature effectively eliminates harmful bacteria, ensuring the chicken is safe to eat. To monitor this accurately, a reliable digital meat thermometer is an indispensable tool in any kitchen. Insert the thermometer into the thickest part of the chicken, avoiding the garlic butter pocket, to get an accurate reading of the meat’s temperature.
For a standard Air Fryer Chicken Kiev weighing approximately 180-220g (fresh or thawed), preheat your air fryer to 190°C (375°F). Place the breaded chicken in a single layer in the air fryer basket, ensuring adequate space for air circulation. Cook for an initial 10-12 minutes, then carefully flip the chicken to ensure even browning. Continue cooking for another 8-10 minutes. At this point, the total cooking time will be approximately 18-22 minutes.
During the final minutes of cooking, insert your digital meat thermometer. If the internal temperature has not reached 74°C, continue cooking in 2-minute increments, checking the temperature after each interval. It is important to remember that air fryer models can vary in power and efficiency, so slight adjustments to cooking times may be necessary. For instance, some higher-wattage models might require slightly shorter cooking times, while older or less powerful units might need a minute or two longer.
If you observe the crust browning too quickly before the internal temperature is satisfactory, a beneficial adjustment is to slightly reduce the air fryer temperature by 10-15°C (e.g., to 180°C) and extend the cooking time by a few minutes. This allows the internal meat to cook gently without over-browning the crispy stuffed chicken exterior. Conversely, if the crust is not crisping sufficiently, a final 2-3 minutes at 200°C can provide that perfect golden finish. Always allow the cooked chicken kiev to rest for 5 minutes before serving; this allows the juices to redistribute, resulting in a more succulent and flavourful experience for your breaded chicken air fryer.
What are the Best Practices for Cooking Air Fryer Chicken Kiev from Frozen Versus Fresh?
Cooking from frozen requires a lower temperature (170°C-180°C) for a longer duration (30-40 minutes) to ensure even cooking, while fresh chicken kiev cooks faster (190°C-200°C for 18-22 minutes), with both methods demanding an internal temperature check of 74°C.
The versatility of Air Fryer Chicken Kiev extends to its preparation state, offering delicious results whether cooked from fresh or frozen chicken kiev. Each method presents unique considerations regarding temperature, timing, and technique to ensure a perfectly cooked, safe, and flavourful meal. Understanding these nuances is key to culinary success, as highlighted by the experts at evilchefmom.
How Do You Cook Fresh Air Fryer Chicken Kiev Optimally?
When preparing fresh chicken kiev, the goal is to achieve a beautiful golden-brown crust and a thoroughly cooked interior efficiently. As detailed previously, ensure your chicken breasts are properly flattened, rolled, and double-breaded. For fresh (or fully thawed) Air Fryer Chicken Kiev, the optimal air fryer temperature is typically between 190°C and 200°C (375°F-390°F).
- • Preheat your air fryer to 190°C for 5 minutes.
- • Lightly spray or brush the breaded kievs with oil.
- • Place the kievs in a single layer in the air fryer basket.
- • Cook for 18-22 minutes, flipping halfway through to ensure even browning.
- • Verify the internal temperature reaches 74°C (165°F) using a digital thermometer.
The shorter cooking time for fresh chicken means the heat can penetrate quickly, resulting in a juicy interior and a crisp exterior. This method is ideal for quick weeknight meals and guarantees excellent results every time.
What are the Key Considerations for Air Frying Chicken Kiev from Frozen?
Cooking frozen chicken kiev in an air fryer is a convenient option, especially for pre-made or store-bought versions. The primary difference is the need for a longer cooking time and often a slightly lower initial temperature to ensure the chicken thaws and cooks through evenly without burning the breading.
- • Preheat your air fryer to 170°C (340°F) for 5 minutes. A slightly lower initial temperature helps to gently thaw the chicken before aggressively browning the crust.
- • Place the frozen kievs in a single layer in the air fryer basket. Do not overcrowd.
- • Cook for an initial 20 minutes, then flip the kievs.
- • Increase the temperature to 190°C (375°F) and continue cooking for another 10-15 minutes, or until the internal temperature reaches 74°C (165°F). Total cooking time will be approximately 30-40 minutes, depending on the thickness and your air fryer model.
- • Always check the internal temperature with a digital thermometer to ensure food safety.
This two-stage temperature approach for frozen chicken kiev helps prevent the exterior from burning while the interior remains frozen. It allows for a gradual defrosting and cooking process, ensuring a tender, juicy chicken with a beautifully crispy stuffed chicken crust, making it a reliable method for a convenient and satisfying meal.
What are the Essential Tools and Ingredients for Crafting Perfect Air Fryer Chicken Kiev?
Crafting perfect Air Fryer Chicken Kiev requires boneless chicken breasts, quality butter, fresh garlic and herbs, Panko breadcrumbs, a reliable air fryer, and a digital meat thermometer for precision.
To consistently create exceptional Air Fryer Chicken Kiev that truly bursts with flavour, selecting the right tools and ingredients is just as important as mastering the technique. The culinary experts at evilchefmom understand that quality inputs lead to superior outputs. This section details the essential components for your journey to a magnificent chicken kyiv recipe.
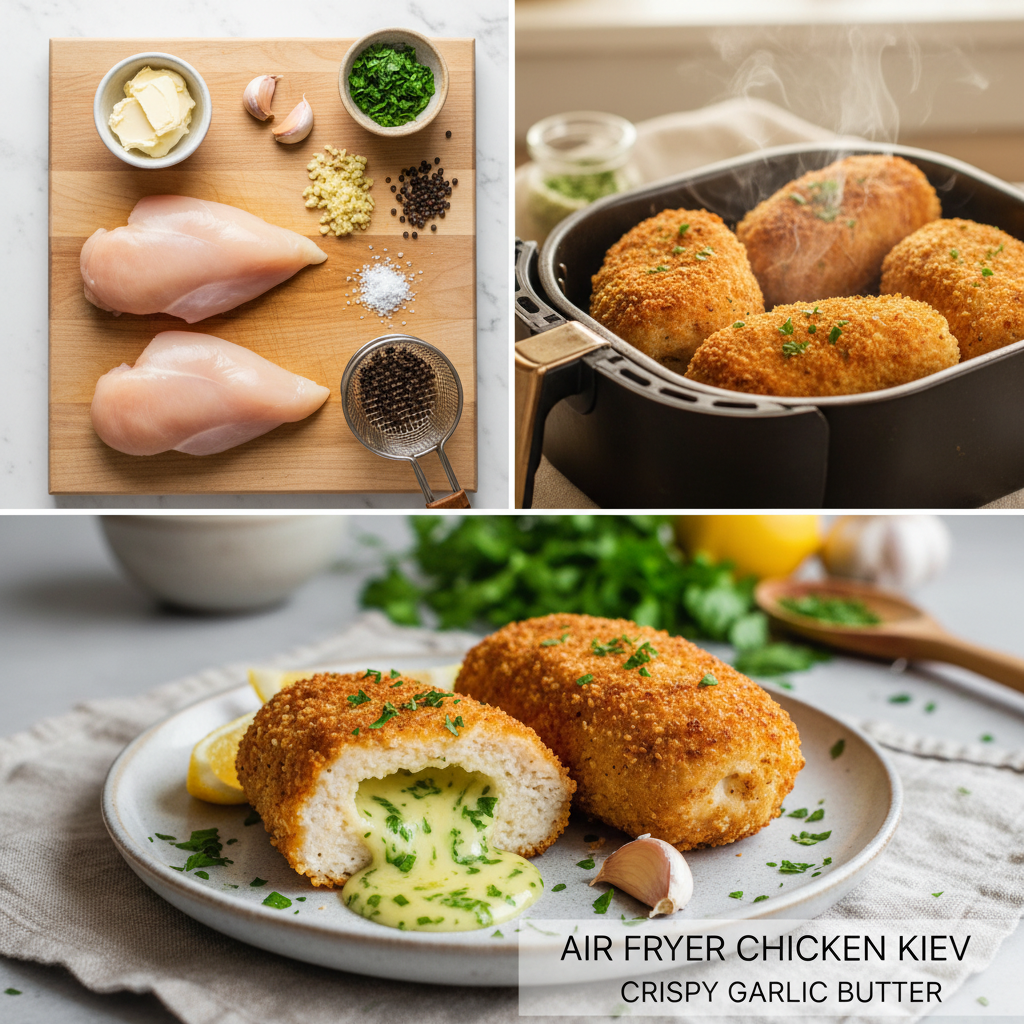
Which Ingredients are Best for a Flavorful Garlic Butter Stuffed Chicken Kiev?
The heart of any Air Fryer Chicken Kiev is its succulent garlic butter stuffed chicken filling.
- • Chicken Breasts: Opt for high-quality, boneless, skinless chicken breasts, ideally between 180-220g each. Free-range options often offer superior flavour and texture.
- • Unsalted Butter: Use good quality unsalted butter to control the seasoning. European-style butters with higher fat content can offer richer flavour. Approximately 25-30g per kiev is ideal.
- • Fresh Garlic: Freshly minced garlic is non-negotiable for that vibrant, pungent flavour. Approximately 1-2 cloves per kiev, depending on size and preference.
- • Fresh Herbs: Finely chopped fresh parsley is traditional, but chives or a hint of dill can also elevate the flavour profile.
- • Seasoning: Fine sea salt and freshly ground black pepper are essential. A pinch of onion powder or white pepper can add subtle depth.
- • Panko Breadcrumbs: As discussed, Panko is superior for air frying, providing a light, crisp texture. Approximately 50-70g per kiev for thorough coating.
- • Flour and Eggs: All-purpose flour for the first dredge and 1-2 beaten eggs for the second ensure the breadcrumbs adhere perfectly, creating a robust breaded chicken air fryer shell.
- • Cooking Oil Spray: A neutral-flavoured cooking oil spray (e.g., rapeseed, sunflower) is ideal for a light, even coating, contributing to the crispy stuffed chicken texture.
For a truly authentic taste, consider adding a small amount of finely grated Parmesan cheese to your Panko breadcrumbs for an extra layer of umami and crispness.
What Kitchen Equipment is Indispensable for Air Frying Chicken Kiev?
Having the correct kitchen tools at hand streamlines the preparation and ensures optimal results for your Air Fryer Chicken Kiev.
- • Air Fryer: A high-quality air fryer with a capacity of at least 3.5-5 litres is recommended to accommodate two kievs without overcrowding. Popular UK models from brands like Ninja, Cosori, or Tower offer excellent performance.
- • Digital Meat Thermometer: Absolutely essential for ensuring food safety and perfect doneness, preventing undercooked chicken or overcooked, dry results. Instant-read thermometers are highly recommended for precision.
- • Meat Mallet or Rolling Pin: For flattening the chicken breasts to an even thickness.
- • Cling Film or Freezer Bags: For covering chicken during pounding to prevent mess and tearing.
- • Shallow Dishes or Trays: Three are needed for the breading station (flour, egg, Panko).
- • Small Spatula or Tongs: For carefully turning the kievs in the air fryer basket.
- • Baking Tray Lined with Parchment Paper: Useful for chilling the prepared kievs before air frying and for resting them afterward.
With these essential tools and quality ingredients, you are well-equipped to embark on creating an exceptional Air Fryer Chicken Kiev that rivals any restaurant offering, bringing joy and satisfaction to your dining table.
What Are the Culinary Benefits and Health Advantages of Air Frying Chicken Kiev?
Air frying Chicken Kiev offers significant health advantages by reducing fat content by up to 75% compared to deep frying, while delivering exceptional culinary benefits such as a consistently crispy exterior, reduced cooking time, and enhanced flavour retention.
The adoption of air frying technology has revolutionized home cooking, offering a compelling alternative to traditional methods, particularly for dishes like Air Fryer Chicken Kiev. This modern appliance brings forth a myriad of benefits, blending culinary excellence with notable health advantages. The experts at evilchefmom are delighted to share how this cooking method elevates your kitchen experience.
What Health Benefits Does Air Frying Offer for Chicken Kiev?
One of the most appealing aspects of air frying is its significant health benefits. Traditional deep-frying submerges food in hot oil, leading to substantial oil absorption and a higher caloric and fat content. Air frying, conversely, uses a fraction of the oil, typically just a tablespoon or a light spray, to achieve comparable crispness.
| Benefit Category | Impact on Health | Quantitative Data (Approx.) |
|---|---|---|
| Reduced Fat Intake | Significantly lowers the consumption of unhealthy fats, contributing to better cardiovascular health. | Up to 75% less fat compared to deep-fried versions. |
| Lower Calorie Count | Aids in weight management and healthier dietary choices. | Approximately 50-70 fewer calories per serving. |
| Acrylamide Reduction | Minimizes the formation of acrylamide, a potentially harmful compound formed in high-temperature frying. | Up to 90% reduction in acrylamide levels in some foods. |
For a dish like chicken kyiv recipe, which traditionally involves a generous amount of oil for frying, the air fryer presents a fantastic opportunity to enjoy this indulgent meal with considerably less guilt. It supports a balanced diet without compromising on the satisfying texture and taste that makes chicken kiev so beloved.
What Culinary Advantages Does Air Frying Bring to Chicken Kiev?
Beyond the health aspects, air frying offers significant culinary advantages that enhance the overall enjoyment of Air Fryer Chicken Kiev.
- • Exceptional Crispness: The rapid circulation of hot air creates an incredibly crispy stuffed chicken crust that rivals deep-frying, often superior to oven-baking. This is particularly noticeable when using Panko breadcrumbs.
- • Even Cooking: The consistent, all-around heat ensures that the chicken cooks uniformly, reducing the risk of uncooked spots or uneven browning. This contributes to the safety and enjoyment of the dish.
- • Reduced Mess and Odour: Without large quantities of hot oil, cleanup is significantly easier, and your kitchen remains free from the lingering smell of deep-frying. This makes cooking more pleasant and less of a chore.
- • Time Efficiency: Air fryers generally cook faster than conventional ovens due to their concentrated heat. A fresh breaded chicken air fryer can be ready in under 25 minutes, making it perfect for busy weeknights.
- • Versatility: While excelling at kiev, an air fryer is a versatile appliance for a wide range of dishes, enhancing its value in the modern kitchen.
Embracing the air fryer for your Air Fryer Chicken Kiev means choosing a method that delivers on both taste and health, providing a convenient and enjoyable cooking experience.
What Are The Best Serving Suggestions and Storage Tips for Air Fryer Chicken Kiev?
For serving, pair Air Fryer Chicken Kiev with light, complementary sides like mashed potatoes, green beans, or a fresh salad. For storage, refrigerate cooked kievs for up to 3 days or freeze uncooked, breaded kievs for up to 3 months, ensuring proper wrapping for quality.
Once you have mastered the art of creating a perfect Air Fryer Chicken Kiev, the next step is to ensure it is served and stored in a way that maximizes enjoyment and maintains its quality. The culinary experts at evilchefmom provide comprehensive guidance to complete your chicken kiev journey, from plating to preservation.
What Are the Ideal Accompaniments for Air Fryer Chicken Kiev?
The rich, flavourful nature of garlic butter stuffed chicken kiev pairs wonderfully with simple, fresh, and slightly acidic sides that balance its richness. In the UK, popular choices often lean towards comforting yet wholesome options.
- • Creamy Mashed Potatoes: A classic pairing, the smooth texture and mild flavour of mashed potatoes provide a perfect foil for the Air Fryer Chicken Kiev, absorbing any delightful butter that escapes.
- • Steamed Green Vegetables: Options like tenderstem broccoli, green beans, or asparagus offer a vibrant colour and a crisp texture, providing a refreshing contrast. A squeeze of lemon juice over them brightens the entire plate.
- • Garden Salad with Vinaigrette: A light, crisp salad dressed with a tangy vinaigrette cuts through the richness of the kiev, offering a delightful palate cleanser.
- • Roasted Root Vegetables: Seasonal UK vegetables like carrots, parsnips, or new potatoes roasted with a hint of herbs make for a hearty and flavourful side.
- • Crusty Bread: Perfect for soaking up any of the delicious garlic butter.
Serving suggestions can be tailored to individual preferences, but the key is to ensure the sides complement, rather than overpower, the star of the dish, the crispy stuffed chicken.
What Are the Best Methods for Storing Cooked and Uncooked Chicken Kiev?
Proper storage is crucial for both food safety and maintaining the delightful taste and texture of your Air Fryer Chicken Kiev.
- • Refrigerating Cooked Kievs: Allow cooked kievs to cool completely within 2 hours of cooking. Store them in an airtight container in the refrigerator for up to 3 days. Reheat gently in the air fryer at 160°C for 10-12 minutes, or until thoroughly heated through, to regain some crispness.
- • Freezing Uncooked Kievs: This is an excellent option for meal prepping. After breading, place the uncooked kievs on a baking tray lined with parchment paper and freeze for 1-2 hours until solid. Once firm, wrap each frozen chicken kiev individually in cling film, then place them in a freezer-safe bag or container. They can be stored for up to 3 months. Cook directly from frozen following the guidance in the previous section.
- • Freezing Cooked Kievs: While possible, freezing cooked kievs can sometimes compromise the crispness upon reheating. If doing so, follow the same cooling and wrapping steps as for uncooked kievs. Reheat from frozen at 160°C for 20-25 minutes, increasing to 180°C for the last 5 minutes for crisping.
By following these serving and storage recommendations, you can extend the enjoyment of your expertly prepared Air Fryer Chicken Kiev, making it a convenient and delicious option for multiple meals or future culinary delights.
Why Is Air Fryer Chicken Kiev a Superior Choice for Modern Home Cooking?
Air Fryer Chicken Kiev stands out as a superior choice due to its harmonious blend of reduced fat content, impressive culinary results with a crispy stuffed chicken finish, and unmatched convenience for busy lifestyles.
In the landscape of contemporary home cooking, the Air Fryer Chicken Kiev has emerged as a truly exceptional dish, embodying the perfect marriage of traditional flavour and modern efficiency. This culinary innovation, championed by the experts at evilchefmom, addresses the desires of today’s home cooks for both deliciousness and practicality. It is not merely a trend but a testament to how intelligent cooking methods can elevate classic recipes.
The primary reason for its superiority lies in its ability to deliver an authentic chicken kyiv recipe experience with significantly enhanced health attributes. By drastically cutting down on the oil traditionally required for deep-frying, air frying transforms a potentially heavy meal into a lighter, yet equally satisfying, option. This aligns perfectly with the growing UK consumer demand for healthier eating habits without sacrificing taste or texture. The process preserves the integrity of the garlic butter stuffed chicken, ensuring that iconic burst of flavour remains the star.
Furthermore, the air fryer’s unique convection cooking mechanism guarantees an unparalleled crispness for the breading, often surpassing what can be achieved in a conventional oven. This results in a truly delightful texture contrast between the golden, crunchy exterior and the tender, juicy interior, a hallmark of a perfectly prepared breaded chicken air fryer. The consistent heat distribution also means less guesswork and a higher success rate for home cooks, building confidence and encouraging more adventurous culinary endeavors.
The convenience factor cannot be overstated. From significantly reduced cooking times compared to oven baking to minimal clean-up, the air fryer streamlines the entire cooking process. This makes Air Fryer Chicken Kiev an ideal choice for busy families and individuals seeking quick, delicious, and healthy meal solutions. The ability to cook effectively from frozen chicken kiev further enhances its appeal, allowing for efficient meal planning and spontaneous gourmet dinners.
Ultimately, the Air Fryer Chicken Kiev represents a culinary triumph, offering a sophisticated yet accessible dish that delivers on taste, texture, and health benefits, all within the demanding constraints of modern life. It is a shining example of how innovative kitchen technology can enhance traditional cooking, making delightful meals more achievable for everyone.
Don’t miss the opportunity to enhance your security with our premium collection of high-security locks and architectural hardware from the experts at evilchefmom. Visit evilchefmom.com today to explore and purchase the finest resources for your project. If you need expert advice or have any questions about our products, our professional team is always ready to assist you via our Hotline: 01386 423984, or visit us at: Unit 3, 56-58 Steward Street, Birmingham, B18 7AE. We believe that with the support of evilchefmom, your cooking skills will achieve outstanding results, winning the trust of users who will share, save and recommend our products, creating a strong impact
Frequently Asked Questions
How do I prevent the garlic butter from leaking out of Air Fryer Chicken Kiev?
To prevent leakage, ensure the chicken breast is evenly flattened, the garlic butter is firm and centrally placed, and the chicken is rolled tightly with overlapping edges. A double breading and pre-freezing the assembled Kiev further enhance the seal.
What’s the secret to a super crispy Air Fryer Chicken Kiev crust?
Achieve a crispy crust by using Panko breadcrumbs, applying a light mist of cooking oil, preheating your air fryer to 190°C-200°C, and cooking in a single layer with sufficient space for hot air circulation. Flipping halfway through helps even browning.
How do I know if my Air Fryer Chicken Kiev is fully cooked?
Ensure Air Fryer Chicken Kiev is cooked through by reaching an internal temperature of 74°C (165°F) in the thickest part of the chicken, measured with a digital meat thermometer. Cook at 190°C for 18-22 minutes, flipping halfway, adjusting time if necessary.